Bleeding Hearts Fondue Fountain

A spooky party needs an equally spooky centerpiece or focal point, and this deliciously creepy Bleeding Hearts Fondue Fountain is perfect to simulate dripping blood in a very, very tasty way.

If you don’t have any vampires among you, it’s okay, because this fondue is made from Almond Bark and tinted red, instead of being bloody for sure.

Melt two packages of White Almond Bark in a double boiler on the stove, stirring frequently. Once melted, remove it from the heat and stir in a stick of butter, cut into cubes. When the butter melts, slowly spoon some chocolate into a bowl of whipping cream until about half of the chocolate is in the whipping cream. Then, pour the whipping cream mixture into the remaining chocolate, stirring until smooth. Add in red Americolor food coloring until you achieve the desired red.

Typically, I’ll suggest that you use Wilton or Americolor, but in this situation, Americolor seems to work best at getting a very true red.

Pour your fondue into your warmed fountain, and turn on the motor. Watch the magic happen.

Serve with dippers like apples or graham crackers.

Or VooDoo cookies, of course.

While this fondue is specially formulated to be thin enough for a fondue fountain, it is still suitable for a regular fondue pot, as well.

Fall Flavors Tour: Better Than Pumpkin Pie

There was this dessert, growing up. It was always appearing at family functions, and almost everyone I knew had heard of the dessert in some form or capacity, though it took different names. For many, it was simply called “Four Layer Dessert,” as though it was something like a seven layer dip. That adequately described it, of course, but it lacked a certain… flavor… that the dessert deserved. Others called it Better Than Robert Redford, which was apparently very important to the adults around me who discussed the dessert, but honestly, as a child or even a tween, that reference was largely lost on me.

There was one other name for the dessert. The one thing I remember, when people would call it by this name, is that typically, the last word of the dessert was kind of whispered, with a wink. “Yes, the, uh, dessert… well, it’s called better than… (whispers) sex.”

Truthfully, though, whether you call it Four Layer Dessert or Better than Robert Redford or even Better Than Sex (I don’t have to whisper, do I? I can, really, if I need to), the dessert was definitely a staple. It took all of the best things in life, from flaky crust to nuts to chocolatey perfection, and amped it up into a light, cool, creamy dessert.

But you see, chocolate just isn’t everyone’s thing. And part of me always wondered why that was served at Thanksgiving, a time when so many beautiful fall flavors are present.

So, while definitely inspired by Better Than Sex, well, this just isn’t it.

This is that, only much.

Much.

Better.

But sincerely, since I couldn’t think of a name that could really suit this dessert while still being exciting and thrilling like the hush-hush name of it’s chocolatey cousin, I decided to simply call this dessert exactly what it is. It’s better than pumpkin pie.

I don’t care if you love pumpkin pie more than your own right foot, this is better. No one, not even my dad (who really REALLY loves pumpkin pie) disagreed with me.

First, the crust.

You’re going to take 1 cup of flour and 1/2 cup of softened butter, as well as 1 tsp cinnamon and 1/2 tsp each of cloves and nutmeg, and mix them together.

Then, press that into a greased 9×13 pan.

Bake that for 15 minutes, and then cool it completely. You want to make sure it’s absolutely 100% cool, or the whole dessert will melt onto itself and get really weird and not at all like the perfect dessert this is, so don’t try to rush it.

For your second layer, you’re going to whip up 8 oz. of Philadelphia cream cheese (that’s one of those little blocks), 1 cup of powdered sugar, and 1 cup of Cool Whip. I like to use my mixer for this, but if you prefer to use a fork, you can.

Spread that evenly on top of your cooled crust.

In the same bowl, take two packages of Jell-O Pumpkin Spice pudding (it’s seasonal) and mix that with three cups of milk.

Let that sit for about 3-4 minutes to thicken up after you’ve mixed it together thoroughly. Then, pour that evenly on top of the cream cheese mixture.

On top of that, take more Cool Whip (enough to cover the pudding) and spread that all over the top.

Then, grate Pumpkin Spice Hershey Kisses over the top. Mmmmm…

Refrigerate, then slice and serve cold.

See? Isn’t that MUCH better than Robert Redford? And pumpkin pie?

One of my dearest friends and taste testers said “This dish is so light and fluffy that you eat it not realizing how many calories you’re eating! It seems like you’re eating a pumpkin cloud, not actual calories!”

She’s right. It’s easy to eat one two fifteen slices of this without a second thought.

If that’s a concern, you can absolutely swap out the cream cheese for a reduced fat cream cheese and the milk for a lighter percentage of milk, and use low-fat Cool Whip as well.

This is the lightest, flakiest, most incredible dessert you can imagine. Even people who don’t like pumpkin pie like this, and it’s got a nice, rich pumpkin flavor to it thanks to the Jell-O pumpkin spice pudding and the Hershey’s Pumpkin Spice Kisses.

Because it’s so light and airy, there’s no way it won’t fit around the turkey and stuffing and everything else at Thanksgiving, and it’s also perfect for Halloween parties because of it’s very festive color.

If you don’t try any other recipe from my Fall Flavors Tour, I am begging you… try this one. Please. I promise you’ll thank me.

_____________________________________

Growing up, did you have a variation of Better Than Sex dessert, and if so, what was it called in your family?

If you try this dessert, leave a comment below and let me know what you think of it! And as always, share pictures- I’d love to see them!

SixSistersStuff.com

Fall Flavors Tour: Pumpkin Spice Frozen Custard

I’m an ice cream addict. I seriously love it, and there’s one ice cream shop in my area that was literally the most amazing place to get ice cream growing up. It still is a great place for ice cream, but I find myself being able to make the trip up there less and less. They have the wittiest flavor titles, like Rock Chocolate Jayhawk, Tiger Tracks, and Powercat Crunch for our major college teams in the area. My personal favorite at the moment is Cookie Monster, which is a sweet cream ice cream tinted blue with Oreos and chocolate chip cookies mixed in. It’s to. die. for.

I still remember the very first ice cream I tried at Sylas and Maddy’s though. It was fall, and they had this one perfect fall flavor that I couldn’t get enough of. See, it was Pumpkin Pie Ice Cream, but they actually included a full pie in every gallon. Not even kidding, they just chopped the pie up and threw it into the ice cream maker. It was rich. It was creamy. It had every ounce of pumpkin pie flavor in this ice cold treat.

I had to see if I could recreate that incredible, intense pumpkin pie flavor, minus the full pie. So, I considered what I had on hand, and thought about ways to use actual pumpkin puree in my ice cream maker, and toyed with different options and recipes. None of them were thick enough, hearty enough, and packed with enough pumpkin spice flavor.

Finally, I remembered that Jell-O has a seasonal pumpkin spice pudding that had exactly the quality of flavor I was looking for. However, the texture of it took it from an idea for ice cream, to an amazing custard-like finished product. It was thick and creamy, just what I needed.

This recipe does call for an ice cream maker to churn it into a creamy creation. However, if you do not have one, you could put the mixture into your regular freezer, but it will be slightly less creamy and whipped.

Because this recipe is straightforward, I just didn’t have many pictures of the in-between process.

Here’s the recipe:

2 Cups whole milk
1 Cup sugar
2 (3.5 oz) pkgs Pumpkin Spice Jell-O Pudding
4 Cups heavy Whipping Cream (I used A&E)
2 tsp. Vanilla Extract

Whisk all ingredients together, put in an airtight container, and refrigerate for two or more hours. Then, pour mixture into ice cream maker and use according to manufacturer instructions. Once thickened, you can serve it as-is, or put it in the freezer to allow it to thicken further.

Serve in a waffle bowl, sugar cone, cake cone, or straight out of the freezer, however you’d like.

You can also take a pie crust and press it into mini tart or muffin tins, brush with butter, sprinkle with cinnamon sugar, and bake until golden brown, then serve a scoop of the frozen custard in the middle to make a delicious frozen pie. Or, you can sandwich the frozen custard between gingersnap or shortbread cookies for a delightful fall ice cream sandwich!

The possibilities are endless.

__________________________________

Do you have an ice cream maker at home? What is your favorite recipe for it? Do you enjoy ice cream during specific seasons or all year round?

As always, I’d love it if you left pictures or comments down below to let me know what you think of this recipe, especially if you try it out!

Oh, and if you’re ever in Olathe, KS or Lawrence, KS, be sure to stop by Sylas and Maddy’s for some of the best ice cream you’ll ever have, ever.

Sweet Sugar Fried Doughnuts

I’m going to tell you a secret.

These are the easiest, most delicious doughnuts you’ll ever make. Seriously, they take less than 10 minutes to make, start to finish.

To me, doughnuts seem like things that are complicated to make. It seems like it would be difficult to do, but it’s really not as intimidating as it seems. But these, these are special doughnuts. Almost magical.

My mom made them frequently when I was growing up, and they are so easy that a child could help you make them. Except for the frying part. Probably not a good idea to let your child do the frying, unless they’re an older child!

So. Step one. Open up a can of biscuits. Any refrigerated biscuits in a can will work for this, but I really like Grands, since they make the biggest, fluffiest doughnuts. I try to avoid any flaky biscuits because they just aren’t the same, but like I said, really almost any kind of biscuit will work.

Just get out your biscuits and separate them out, into individual biscuits.

This is where it kind of depends on your own style of doing things. I like to use my mini circle cutter to cut holes out in the doughnuts, making them more of a traditional shape. My mom likes to just take a knife or kitchen shears and cut the biscuits in quarters. You can leave them whole, you can take a cue from my mom and I and cut them however you prefer, or you can cut them any other way you desire. You could even use cute tiny cutters to cut out a fun shape (like a star or heart!) out of the middle of the biscuit and make creative doughnut holes to nibble on.

Grab your favorite frying pan and pour some oil in it. This is where I’m kind of funny. We have a whole slew of quite expensive frying pans, and instead of choosing to use those, I prefer to use this $10 pan we got on sale one time. It seems to be the most non-stick of all of my pans, so I always use it when I fry things. I wish I remember where I had purchased it, because I’d buy a whole flock of them and get rid of most of my expensive pans.

Pop those puppies in the frying pan on medium heat, and start preparing your cinnamon sugar mixture. Mix cinnamon and sugar in a bowl until you feel like you have the right amount of each. You can also play with spices here, if you’d like– sometimes I add nutmeg, cloves, pumpkin pie spice, apple pie spice, cinnamon maple crunch, whatever sweet yummy spices I have in the cabinet, I tend to cycle through them on days I make doughnuts. Keep an eye on your doughnuts!

From here, things will go very quickly. When the side of the biscuit puffs up and starts to rise, it’s time to flip them. You’re going to want them to be golden brown on the side you were frying, like the biscuits in the upper right corner of the photo below.

The ones on the bottom left aren’t quite ready, so I flipped them back over to get them a little more golden on that side.

As you pull the biscuits that are golden on each side out, drop them into the cinnamon sugar mix and coat them on each side with the mixture, then put the coated biscuits on a paper towel to drain off any extra oil.

Then, serve the whole pile of biscuits to your family or friends, or eat them all yourself, like I’m prone to do. They’re delicious plain, but I especially like mine drizzled with warm maple syrup. Honey also works, or even chocolate sauce or even topped with a pile of whipped cream or fresh or frozen fruit.

Delicious!

Holy Cake Mix Brownies, Batman! (With Cookie Dough Frosting, of Course!)

I’ve found lately that I really like to make things in threes. Last week, you saw a dip trio from me. And today, I present you with a yummy brownie trio. Yes. Not one, not two, but THREE kinds of brownies.

And they’re so easy. As easy as buying a brownie mix even, except for the fact that these are WAY better, and have way more variety. It took me a couple of tries to get just the right consistency down, but these, these are just right. And delicious, and ooey-gooey.

Take a box of cake mix (My three varieties were dark chocolate, red velvet, and yellow, respectively). I use Duncan Hines, because I think it produces the moistest brownies, but you can go with whatever mix you have in your pantry.

Pour the box of mix into a big bowl. Add in 1/4 cup of oil (vegetable, canola, whichever floats your boat. Probably not olive oil. That would be weird), a beaten egg, and 1/4 cup milk. Mix it up. It’s going to be really really thick. Almost impossibly thick. That’s a-ok.

If you want to add anything, now is the time to do it. For my yellow cake mix, I added in 1/3 cup of sprinkles, and in the red velvet ones, I added in a couple of handfuls of something called “Vanilla chocolate chips,” which I’m pretty sure has no actual chocolate in it, just vanilla, but you get the point. I left the dark chocolate ones without any additions, because I gave it the royal treatment with some awesome cookie-dough flavored frosting.

Pour the batter into a greased 8×8 pan. Bake at 350 for 25 minutes. And then wait. And wait. And wait some more. These are so ooey-gooey that if you don’t wait, they’ll ooze all over the pan. If you wait, though, when you slice them, they’ll be perfectly gooey inside, but they won’t fall apart.

Oh, and you’ll want to know this yummy little tidbit. The yellow cake mix funfetti blondie? It doesn’t taste like cake. It tastes like BATTER. Pure, delicious, cake batter.

The frosting is equally easy. Cream together a stick of room-temperature butter, just under 1/2 cup of white sugar, and just under 1/2 cup of brown sugar. Really cream it together until it’s light and fluffy (if you’re using a hand mixer or stand mixer, it’ll take a couple of minutes). Gradually add in 1 cup of flour mixed with 1 cup of powdered sugar (confectioner’s sugar). Stir in 3 Tablespoons of milk (until it reaches desired consistency) and a teaspoon of vanilla extract. Make sure it’s all well mixed, and you’re done! After frosting whatever you’re frosting (in this case, brownies, but this frosting is awesome on cupcakes, spoons, and yes, even cookies), sprinkle it liberally with mini chocolate chips. Yum.

And, without further ado, here are the full recipes:

Funfetti Cake Batter Blondies

1 Box Yellow Cake Mix
1/4 Cup Oil
1/4 Cup Milk
1 beaten egg
1/2 Cup rainbow sprinkles

Mix together first four ingredients in a bowl to form a thick batter. Stir in Rainbow Sprinkles until fully combined. Spread into greased 8×8 pan and bake at 350 for 25 minutes. Let cool 1 hour before slicing or serving.

Red Velvet Brownies

1 box Red Velvet Cake Mix
1/4 cup Oil
1/4 cup milk
1 beaten egg
2 large handfuls of vanilla chips or white chocolate chips

Mix together first four ingredients. Add in vanilla or white chocolate chips and mix until fully combined. Spread into greased 8×8 pan and bake at 350 degrees for 25 minutes. Let cool 1 hour before slicing and serving.

Chocolate Fudge Cake Mix Brownies

1 box chocolate fudge cake mix (or dark chocolate cake mix, or chocolate cake mix)
1/4 cup milk
1/4 cup oil
1 beaten egg

Combine ingredients and spread into greased 8×8 pan. Bake at 350 for 25 minutes. Let cool 1 hour before slicing and serving.

Cookie Dough Frosting

1 stick butter (room temperature)
1/2 cup white sugar
1/2 cup brown sugar
1 cup flour
1 cup powdered sugar
3 tablespoons milk
1 tsp vanilla extract
Mini Chocolate Chips (about 1 tablespoon per brownie, cookie, or cupcake)

Cream together butter, brown sugar, and powdered sugar until light and fluffy (about 2 minutes).
Gradually add flour and powdered sugar.
Stir in milk until mixture reaches desired frosting consistency, then add vanilla extract and stir.
Frost items, then sprinkle on mini chocolate chips. Or, eat with a spoon. Or your fingers. Whatever.

The possibilities are totally endless when you’re making a brownie out of cake mix. Strawberry blondie? Totally do-able. Spice brownie for fall? Yup, you can do that. German chocolate brownie with coconut frosting? Yeah, I’m pretty sure that would be awesome. You could even mix nuts into that batter. Yummy. Carrot? Apple caramel? Banana, orange, lemon, strawberry supreme? The possibilities are literally endless. If you can find a cake mix for it, you can probably make a brownie like this out of it.

What flavor are you going to try first?

Delicious Cookie Dip Trio

What’s better than one dip or two dips? How about a trio of delicious sweet dips!

Seriously, I had been staring at Pinterest a few weeks ago, and stumbled on the very-popular cookie dough dip. I got the bright idea that one cookie wasn’t enough. Two cookies might have been enough, but I had this handy dip container that has space for three dips, and, well, why not serve three pretty dips?

I’m going to tell you right now… these are ridiculously easy recipes. I’m going to start with the hardest recipe, but it truly isn’t hard at all.

I love cookie dough. Seriously, love it. Half the time, when I go to make cookies, I don’t even get actual cookies. I get a dough-covered spoon. So if someone tells me that I can make a dip that tastes like that cookie dough, but is eggless and safe to eat, I’m on board! The problem is, a lot of recipes I had been finding tasted a lot like cream cheese with chocolate chips added. There was one key ingredient of cookies missing that really helped make a cookie taste like a cookie. After a lot of trial and error, I bring you…

Cookie Dough Dip that actually tastes like a Cookie!

Grab 1/2 a cup of butter (yup, that’s about 1 stick). Melt that in a saucepan, and add 1/3 cup brown sugar, whisking it in until it’s all blended together completely. When it starts to bubble over the heat, remove it from the heat and stir in 2 teaspoons of vanilla extract.

In a separate dish, cream together an 8-ounce block of cream cheese and 3/4 cup powdered sugar. Add in the brown sugar mixture and stir until it’s thoroughly blended.

And here’s the part that makes it into a cookie-flavor. Add in 1/3 of a cup of flour. Mix it until it’s all smooth, and add in 3/4 of a cup of mini chocolate chips.

Refrigerate until you’re ready to serve, and top with a handful of mini chocolate chips.

You know those Keebler Frosted Animal Cookies? Those really addicting ones? Yeah, those. Well this dip is kind of like that, only a billion times better (and more addicting, of course).

And did I mention it’s only 3 ingredients? (Well, kind of, if you don’t count sprinkles and red food coloring, which are totally optional).

Take an entire bag of those animal cookies. Okay, the entire bag minus the five you eat during the crushing process. Crush those babies up. Mix that with one 8-ounce block of softened Philadelphia cream cheese. Refrigerate.

Right before serving, tint a tub of Cool Whip animal-cookie-pink. Yes, that is the technical term. Fold the Cool Whip and dip together, and sprinkle liberally with nonpareil rainbow sprinkles!

Then eat. Seriously, that’s it. So simple.

But wait! There’s more! This dip is made the same way as the Animal Cookie Dip, except… with Oreos! All you do is take an entire package of Oreos (hold back 5 so you can eat 2 and save 3 for a garnish) and crush them to bits. I like to use the rolling pin/ziploc bag method, but you can just shred them with your hands, or use a food processor or slap-chop or something.

Add in your block of softened Philadelphia cream cheese. Refrigerate until you’re ready to serve, then mix in a tub of Cool Whip. Top with your remaining 3 Oreos (of course, crumbled up, too).

Here are the perfect dippers. We loved pretzels, ruffly chips, graham crackers, and vanilla wafers.

So, what was the resounding favorite? It seemed like the Oreo and Cookie Dough were tied for first, but it varied day-to-day. Pretzels and graham crackers topped the list of best dippers for these. I was a huge fan of cookie dough dip one day, and the very next day, thought Oreo was the best. They’re all so good!

Try one, or all three, and comment below letting me know what you think!


Hungry for more cookie-inspired treats? Try my No-Bake Cookies and Cream Truffles, or my Cake Mix Brownies with Cookie Dough Frosting!

Crystal Light Sour Appletini Ice Cream

It has been 110 degrees here every day for about a month. I am dying. Seriously, even a dip in the pool is almost like swimming in a hot tub at this point, providing little to no relief from the really high temperatures around here. They’ve even been peaking to 115 degrees.

This is not okay with me. I prefer temperatures around 70 and 80 degrees, so this is just downright ridiculous. However, it has given me more than a few opportunities to break out my ice cream maker and play with it a little bit. It has resulted in some yummy concoctions, but none was more a hit than this one… a nice, icy, Crystal Light Sour Appletini Ice Cream.

I’m going to start here by saying that this recipe involves zero alcohol, so it is kid-friendly (I’m including myself in the kiddo category!)

As soon as Crystal Light came out with their mocktails, I was hooked on them. They’re delicious to whip up on a warm day and serve iced. I have always been a Crystal Light fan, mind you, but the new drinks really take the cake. The other day, I went to the mailbox, and found a fun gift from Crystal Light—a mocktail glass!

I’m going to be the first to say that, as a non-drinker, I have no idea how to even hold one of these pretty things, so while I immediately poured a glass of the Crystal Light mojito in it (yes, I’m aware, it’s the wrong glass to serve that in or whatever…) I actually kept spilling it on myself. I’m not kidding. But I wanted to get some use out of this fun glass they sent me, and I thought back to all of the times I’ve served desserts in glasses like that.

It hit me. I had to make a Crystal Light ice cream, and I had to do it right away.

At first, I had trouble deciding which flavor to use. I am absolutely certain this ice cream would work with any type of Crystal Light, but I really wanted to see how an Appletini version would turn out.

This is, honestly, the easiest recipe you’ll ever find for ice cream, hands down. There are no eggs. There’s really no measuring involved. All you do is grab your ice cream maker and your three ingredients, and you’re good to go.

Start by pouring a 2 liter bottle of ginger ale into your ice cream maker cylinder thing. (I think that’s the technical term for it!)

Pour in your Crystal Light Appletini Mocktail packets, or the Crystal Light packets of your choosing. (Note: I’ve found kids really like the punch that three packets of Crystal Light adds—it is a VERY sour apple flavor. Adults seem to prefer a recipe involving only two packets of the Crystal Light for the appletini recipe. It’s up to your own discretion, but the flavor of whatever packet you use will be stronger with the additional packet).

Add in a can of Sweetened Condensed milk. My grandfather swears by Eagle brand, my grandmother is a fan of Carnation, but personally, I buy the cheapest I can find at the moment, which in this case, happened to be generic. It will look something like this.

That’s it. Put the dasher into your ice cream machine, put the lid on, and turn that puppy on! Use your ice and rock salt the way you typically would for an ice cream, and then wait. And wait. And try to avoid opening the machine to see what it’s doing (I am the most impatient person alive). I personally use a Rival 4-quart machine and it takes about an hour and a half, but you can use this recipe in any 4-quart ice cream machine.

When the machine is done with it, it is typically more of a “soft serve” texture. It’s yummy like this, but I like to freeze it a little harder, typically for several hours or overnight.

Then, you can serve it in your favorite martini glass, and enjoy poolside, spoon optional.

Nutrition and serving information: The dessert clocks in at about 92.5 calories for a half cup serving (closer to 95.5 if you use 3 Crystal Light packets in the recipe instead of 2), which is a good 35 calories less than plain vanilla ice cream at the store. This recipe for Crystal Light Ice Cream also contains 1.5g Fat and 17.5g Sugars. Not exactly diet, but not exactly tipping the scale, either. You’ll get roughly 28 servings from one recipe, or about 3.5 quarts total.

Dazzling Duncan Hines Red Velvet Pancakes

When I was in elementary school, once each year, near Christmas time, we would get a single slice of Red Velvet cake as a part of our lunchtime meal. The tradition dated back even before my mother was in school, and it was one of my favorite lunchtime treats of the year from our cafeteria.

You see, there’s nothing about Red Velvet cake that I don’t love. It’s chocolatey, which, duh, is amazing. And it’s a bright, rich, red color, which is always a little more interesting than boring brown chocolate. And then, of course, there’s the delightful cream cheese frosting that just really compliments the chocolate flavor.

Fast-forward to the present. When I was at the Duncan Hines test kitchen in Parsippany, I was blessed enough to get a sneak preview at products coming soon from Duncan Hines, provided that I kept my pretty little mouth shut until the big reveal from Duncan Hines. It has been killing me not to tell my blog readers about it because I know you guys will love it, but today, Duncan Hines finally made the big product announcement about one of the absolutely delicious items that I got to taste! Below, you’ll see their big reveal!

This red velvet cupcake mix is special for many reasons. First off, the frosting mix is right in the box, so you can bake your cupcakes and whip up the frosting mix, and only have to buy one package. I love that– it’s so convenient. Plus, I’m one of those people who buys a mix and says “Oh, yeah, I totally have the frosting for this at home,” and then I get home and surprise! No frosting. This is incredibly handy because it’s all-in-one, basically. Plus, it comes with a pastry bag! That means you can fill and frost your cupcakes so easily.

While we were in the test kitchen, Chef Joe showed us how to fill them easily. You just stick the bag into the center of the cupcake, about halfway down. You apply pressure as you pull the bag up out of the cupcake, and swoosh it around to frost, all in one motion! Easy-peasy and it looks incredibly professional!

Each of the Duncan Hines winners received a box of the brand-new Red Velvet mix as part of our winning weekend prize package, so we were the first to try it before it hits stores.

When I got the box, I first considered making the cupcakes following the instructions on the box. Then, I thought about how I had already tasted that at the test kitchen. I considered making the brownie recipe found on the side of the box, but then I really got to thinking.

Duncan Hines chose me as a winner because I’m innovative. My recipe was something new and exciting using a fairly basic ingredient. And this, you see, it was no different. There are many, many great ways to enjoy this boxed mix (one of my favorite people from the winning weekend had a great recipe to turn it into ice cream! Um, yes, please!), and I thought it would be nice to shake things up.

I started thinking about my favorite red velvet creations. My mind wandered towards cakes and the ice cream fellow winner Sandra came up with, and landed on IHOP’s Red Velvet Pancakes.

If you haven’t tried them yet, I think you should honestly stop reading this post for a second and drive to your nearest IHOP. It’s open 24 hours a day. If you live in America, you really have no excuse not to taste them, seriously. Or, you could just keep reading because…

…I totally have the best Red Velvet Pancake recipe here, like… ever. I promise. It’s IHOP’s pancakes on steroids. These are light and fluffy and drizzled with delicious cream cheese glaze and the best part is, it’s from a BOX. Because, you know, I use Duncan Hines religiously and if you can make pancakes from a boxed cake mix, why the heck wouldn’t you?

Start by making the glaze first. You want to soften a stick of butter and then whip it up using an electric mixer. Once it’s whipped, slowly add in the powdered cream cheese frosting mix from the Duncan Hines Decadent Red Velvet Cupcake box while continuing to mix on low.

Can you see my awesome vintage Hamilton Beach stand mixer? I recently inherited it- it belonged to one of my great aunts who enjoyed baking probably as much as I do. I am in love with this thing.

Anyway, you’ll notice it’s still pretty powdery when you just have the butter added. Instead of doing what the box mix instructions say, you’re not going to add just the four teaspoons of water… that would give you a thicker frosting for cupcakes. Instead, you’re wanting a glaze, so you’re going to slowly add in two TABLESPOONS of water. It’ll give you a much thinner glaze.

This top photo shows you a little more of a thicker glaze, with just the one added tablespoon. The picture below shows how it gets much thinner with the second added tablespoon. See how that is more “drizzle-on-pancakes-worthy”?

Now, set your glaze aside and get to work on those yummy pancakes! You’re going to take a bowl and dump in the cake mix that came in the Duncan Hines Decadent Red Velvet Cupcake box. Add between 1 and 1 1/2 cups of flour (I could be really specific here and say 1 1/4 cup, but really, it’s personal preference on whether you prefer thinner cakes or thicker ones), a tablespoon of sugar, 3/4 teaspoons of baking powder, a little salt, 2 eggs, a little vanilla (a teaspoon is plenty!), and 2 cups of cold milk. Whisk those puppies up and get all of the lumps out.

Grease your pan or griddle really well, warm it up to around 300 degrees (you’ll know it’s done if you drip a little dab of water on and it sizzles up), and then pour some batter on. I make BIG pancakes, around two heaping spoonfuls of batter, but you can easily make whatever size you want, obviously. My son and brother are big fans of silver dollar pancakes.

From here on out, it’s pretty much like your standard pancaking… you’ll want to wait until bubbles appear, flip it, and then wait a bit and take it off of the pan. Seriously, it’s not rocket surgery or brain science, just pancakes. I’ve always been intimidated by making pancakes, and when I finally made them, boom! It’s actually easy. I swear. If it weren’t, I wouldn’t make them (I’m writing this with the hope that there is some poor soul out there, like me, who hasn’t yet attempted to make pancakes and just needs that extra little nudge).

Aaaaanndddd…. FLIP!

So, I’m not exactly the best flipper in the world, but I promise you, they taste yummy. In the end, you’ll get a towering stack of delightful rich red pancakes with an intensely perfect chocolate flavor. The stack is actually a little taller than this, but a few of the hotcakes had already been stolen by little pancake thieves… I got around 15 pancakes from it.

Now, grab a couple of those and drizzle (or drown!) them with cream cheese glaze! I liked mine with just a tiny drizzle, as shown in the picture, but my family loved pouring the cream cheese frosting over them until they were more white velvet than red. Either way, these are a true hit, even with the youngest eaters (my son devoured one, minus the glaze!)

Seriously, look at how thick and fluffy those puppies are! They’re huge!

And all of this just goes to show you, once again, that with Duncan Hines, there really aren’t any limits to your creativity. You may be using a box of cake mix, but that doesn’t mean you have to limit yourself to that box. Stretch yourself, be creative, and you will absolutely love what comes out of it. I’m going to be honest… I can’t remember the last time I used a boxed cake mix to actually make a cake.

Duncan Hines will be releasing the new Decadent Red Velvet Cupcakes, complete with frosting mix and pastry bags, in stores now!

Do you love Duncan Hines Decadent Mixes? Try my great Rustic Carrot Cake Cookies featuring the Decadent Carrot Cake Mix, or these Pumpkin Spice Truffles using the Pumpkin Spice Decadent Cupcake Mix! Hungry? You can view all of my recipes in the Food section of DigitalEraMom.com!

Disclaimer: As a Duncan Hines Frosting Creations winner, I was given a box of this mix to try for free. All opinions of those are from my family and myself, not from Duncan Hines or Pinnacle Foods.

On Healthy Lunches for Little Tummies

How do you plan a lunch for a one year old? What's a suitable snack for an 18 month old? These healthy lunch ideas for the littlest tummies make food planning for babies just past the baby food stage easy!

Once a child outgrows the baby food stage, it can be tough deciding what to feed them. With my own son, I try to make sure he’s eating a great, balanced diet. Mind you, he enjoys pizza crusts and chocolate pudding, so he gets a bit of “junk food” from time to time, but I’ve found a few ideas and tips to keep food as healthy as possible.

Those who know me know that his purees have all been homemade. I understand why families choose to use Gerber and Beech Nut foods- I truly do. However, when I was pregnant with Zach, I made the decision that the best choice for our family was to have homemade purees. I hope that no one takes offense to the fact that I am a very homemade-feeder, because I’m not condemning anyone who chooses to feed their children store-bought foods! In fact, I give Zach some storebought foods (my favorites are Plum Organics, Ella’s Kitchen, and HappyBabyFood).

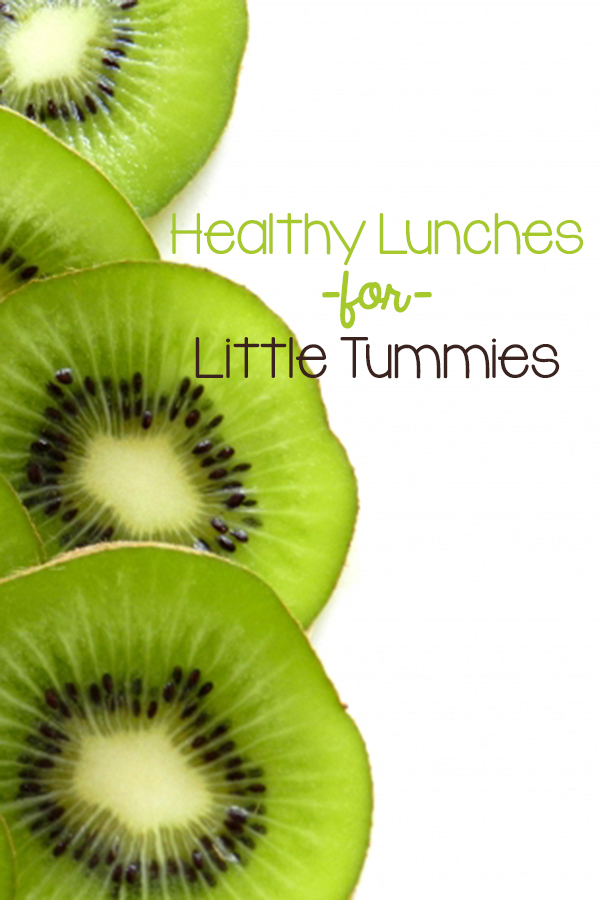
It’s really easy to think about healthy eating for adults- we all know how to read a Food Pyramid (well, I guess now it’s a “food plate,” but, I grew up in the Food Pyramid years and I don’t adapt to change well!) We also know that eating a variety of colors is good for us…

Red food helps provide lycopene, which is excellent at fighting heart disease. Greens are typically very high in fiber, and they provide antioxidants that help vision. Blues and Purples have phytonutrients that help promote healthy brain functions. Yellow and orange foods help boost the immune system with protective antioxidants.

The same principles are true for children- it’s important for them to eat a variety of foods in a variety of colors. Giving babies solid foods (after the doctor has approved it, of course) also helps them to stay fuller longer, which I personally have found means that Zach isn’t waking up as much because he stays fuller overnight.

I’m not a nutritionist or a doctor- I’m a mom- so please take what I have to say with a grain of salt (and always pass information through your doctor to find out his/her specific recommendations).

These are just my tried and true tips for helping your tot get plenty of different colors and food groups in a day.

Zach’s primary source of food is breastmilk. It provides the essential nutrients he needs, as well as providing plenty of things to boost his eyesight, his brain function, and more. In order to make sure he is getting plenty of healthy nutrients in his breastmilk, it’s important that I pay attention, first and foremost, to what I eat. Because this doesn’t always happen, his second line of defense is to make sure what he eats is a good healthy mix of foods. When I feed him, I try to make sure that his meals have an inviting presentation… even if he destroys my “food art” the second he sits down, it helps him see all of the fun colors and textures I’ve provided for him. Additionally, I’m not afraid of “messy” foods- I just try to plan messy foods near bathtime (so, most of the time, the messy stuff is served for dinner instead of lunch).

Messy play helps to encourage creativity, while stimulating the brain and boosting confidence. I know it seems odd that all of those things can be tied in together, but they are!

In order to show you how I serve Zach a variety of foods, here’s an example meal plan for him.

Breakfast

Single-grain cereal (oatmeal) mixed with fruit puree (homemade- bananas, peaches, apples, blueberries, a mixture, etc) and yogurt (plain or vanilla- NO HONEY!)

Lunch

String cheese (1/2 a piece, typically, torn into long strips that he can easily pick up himself), 1 piece whole grain or whole wheat toast (cut into triangles, no crusts) spread with fruit puree (organic pouch or homemade- I try to alternate between vegetables and fruits, or do half and half- he particularly likes sweet potatoes, the PlumOrganics Peach MishMash, bananas, or apple-blueberry blends), a few yogurt bites (we like HappyBaby Yogis), some cheese puffs (we like HappyBaby Organic Carrot and Cheese or Broccoli and Cheese puffs), some fruit puffs (we like PlumOrganics Superpuffs- I vary his colors every day over a week, or mix a few colors together at lunchtime), and a few sweet potato fries.

Dinner

Sometimes he’ll eat a pre-meal of some sweet potato fries, since he sometimes gets hungrier while dinner is cooking. Typically, he eats what we’re eating- if it’s spaghetti night, he may have a piece of toast spread with some homemade spaghetti sauce, some ground beef, and some mozzarella string cheese. If it’s pot roast, he’ll usually have some potatoes and carrots, and some roast that I’ve shredded. On homemade chicken and noodles night, he gets some noodles, some veggies, and some chicken from the soup. At dinner, I try to encourage him to drink from a cup, so I also give him some breastmilk in a cup- he has my help drinking it.

Dessert

Zach is a huge fan of desserts, but whenever I can, I try to keep it healthy. One of his favorite things is to eat “ice cream.” I have a Yonanas maker, which is an amazing machine that you feed frozen bananas (as well as other fruits, if desired), and out shoots something the consistency of soft serve. There are no other ingredients like milk or sugar- it’s literally JUST bananas (and any other additives you elect to add- sometimes we’ll toss in blueberries, dark chocolate, or frozen peaches or mangos). He is getting fresh fruit, but he feels like he’s getting an amazing ice cream treat.

Another recipe we’re fond of is ABC Pudding… you take one avocado, four bananas, and 1/4 cup of cocoa powder, and blend it in a blender (if the taste isn’t up your alley, adding a little sugar can help, but I try to keep it as low-sugar as possible for Zach). It’s important after blending to refrigerate it for at least one hour- this lets the pudding flavors blend. Avocados provide essential fats that babies need. Don’t worry about baby foods containing fats- babies need it for proper growth and development! Avocados provide a GOOD kind of fat that is healthy for baby (and for mommy, too). Sometimes, with the ABC Pudding, I’ll mix a little of his cereal in- it adds some texture while also adding some grains if he hasn’t had as many during a particular day.

Snacks

We typically stick to fresh or frozen fruit pieces, sweet potato fries (homemade), and HappyBaby Yogis or some Puffs (fruit, vegetable, or cheese-vegetable) from HappyBaby or Plum Organics.

So, in one day, Zach is getting multiple colors, a good mix of dairy, protein, fruits, vegetables, and grains. He’s also getting breastmilk several times a day (morning nap, afternoon nap, served in a cup with dinner, evening nap, before bed, and once during the night) on demand- if he wants to eat, he eats, and he chooses when he’s going to have breastmilk. I leave that very much up to him (if I pick him up and he’s trying to lift my shirt or grabbing at me, I know he definitely wants breast milk. When he is trying to push it away when I offer it, I know that’s not what he’s looking for). Breastfeeding on demand means he’s getting what he needs, and he is the final deciding factor in when he has breastmilk, and when he doesn’t.

Zach is good about showing when he’s full, and by allowing him to feed himself for several of his meals, he’s able to make it clear when he wants to eat, and when he doesn’t. When he stops feeding himself, he is typically done with his meal. I still try to make sure I’m helping him eat his breakfast, but I think it’s important to encourage him to spoon feed by giving him his own spoon to eat with- we both have spoons. I’ve also found that this eliminates him grabbing the spoon I’m trying to feed him with, which was a sticking point for our previous meals.

As for messy eating, I put a spoonful of pudding on his plate or tray, and he goes to town with a spoon and his fingers. If it ends up on his eyebrows and his ears instead of in his mouth, that’s okay. If it gets spread around the entire tray and he does a finger-painting method, that’s okay. It’s all washable. His clothes, his body, his tray… they can all be cleaned. I want him to get enjoyment out of what he is doing, express his creativity, and be encouraged in that. He learns that pudding tastes a lot better in the mouth than on his eyebrows because he tries putting it both places and experiences that.

Mealtime can help nutrition and self esteem. When I see he is doing a good job with eating, I encourage him by saying “Good job, Zach! You’re eating all of your colors!” We talk about the different colors and textures he gets. “Is that puff crunchy? Yummy!” “That pudding is squishy, isn’t it? I bet that feels funny in your fingers!” “Look- you’ve got purple, red, and green on your tray!” (Point to the colors as you say them). The more words you introduce to describe what he’s eating, the more he’ll learn different terms for those things as well.

I’m not going to say that I’m a perfect parent- there are many days when healthy eating goes out the window. I’m not above sitting my son down with a bag of Cheerios (oddly, he doesn’t care for them) or a little bit of chocolate pudding. I’ve fed him conventional ice cream from my favorite ice cream shoppe before. It’s not the end of the world for him to experience those things, too. But I’ve found the more I encourage him to eat healthy, the more he takes on a preference to that. My son tends to turn his nose up when I’ve given him Gerber (on the go, in an emergency)- it’s just not his preference after having the homemade.

Here are some ideas of what sorts of foods to feed your tot. Make sure what they have is soft enough for them to eat, and able to be chewed reasonably easily.

Dairy String Cheese, Yogurt, Freeze dried yogurt, Puddings made from milk

Protein String cheese, yogurt, meat purees, small chunks of meat

Grains Whole wheat or whole grain bread, strips of tortilla, barley, oatmeal, rice, puffs made for babies, Cheerios

Fats Avocado

Vegetables and Fruits Sweet potatoes (orange), bananas (yellow), smashed or pureed peas (green), green beans (green), pureed or steamed apples, beets (purple), smashed or pureed blueberries (purple), peppers (yellows, oranges, reds), peaches, pears, Puffs made for babies that include fruits and veggies (added into a diet sparingly).

There are plenty of choices for kids to eat, so use your imagination. Make sure you choose items that are easy to gum. If anything is a choking hazard (peas, grapes, etc), make sure you either smash them or puree them, so your child doesn’t choke.

Finally, below is my absolute favorite way to make Zach’s baby food. I’ve found that this works well for purees for him (but I’ve also used it for smoothies for me, or to make salsas and more!) It’s a true multi-purpose kitchen gadget, and the storage cannot be beat- the silicone tray is perfect for freezing a lot of different baby food purees, and now that Zach doesn’t eat as many purees, it’s good for freezing little mini pudding pops for Zach, which are super soothing on his gums! I can’t live without this! (Image linked again)

Ultimately, you have to choose the right foods for your child, but a lot of it is about mixing and matching, and building meals around what your child likes. Just remember the simple principles- Remember your food pyramid, and make sure your child is getting a rainbow of colors!