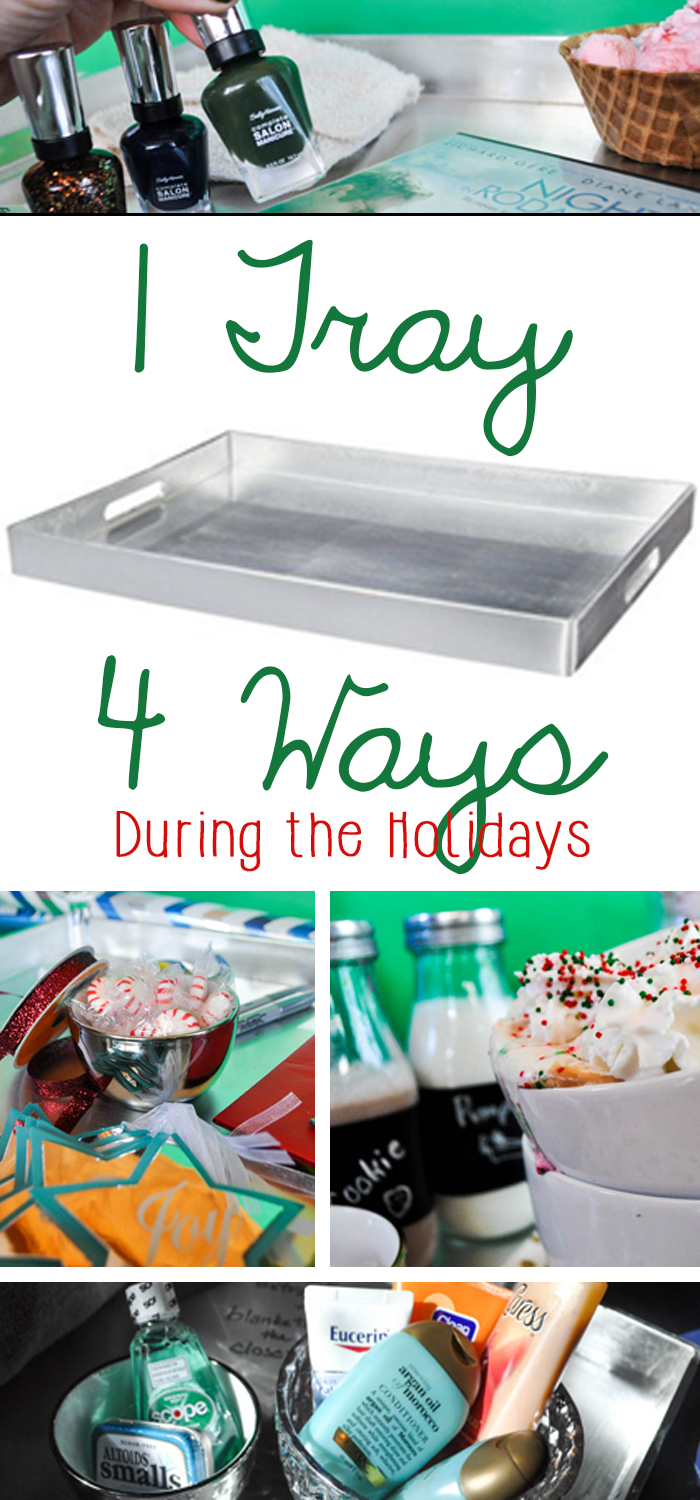
I’ll admit it, I’m obsessed with those adorable decorative serving trays you find in stores. Every time I go to Target, I lust after the newest one they’ve released, and every time, I pass it by. I mean, how will I use it, outside of breakfast in bed? I’d really love to use it, but I mean, is it practical? I ask myself every time. After passing up this particular tray all last season, when I saw it reappear at Target, I knew I had to have it! So, I sat down, determined to figure out ways I could use this tray before I spent the money. And trust me, I was not disappointed with the ways I’ve been able to use it. Are you longing for a beautiful serving tray?
Author: Mama
How Long Do Spices Last?
Things that go hand-in-hand with Thanksgiving… Family. Football games. Black Friday. Spices. But how do you know that your spices are really still good? From cinnamon to basil and everything in between, how long do spices last?
Well, in short, spices never truly go bad. It is highly unlikely that you’ll get an illness from a spice unless it’s contaminated somehow. That said, spices do lose their flavor and potency over time, which means that even if you won’t get sick from too-old cinnamon, you may not taste it to it’s full potential if it’s been sitting there for too long.
If you listen to a lot of cookbooks on your shelf, you may hear suggestions to toss your spices after about a year, with some even going as far as to say 6 months. But if you ask the spice manufacturers, you may get some really blurry guidelines, as well. There’s no good way to say “This is definitively how long a spice lasts.” The biggest tell-tale sign is your own senses.
If a spice has a good aroma, it’s good. If it has a good color, it’s good. If it has good flavor, it’s good. Go test it out– compare a spice you just bought side-by-side with it’s older counterpart, and you’re going to sense a difference.
That said, there are some general ideas of how long a spice will last.
Seasoning Blends, depending on the ingredients inside, will last 1-2 years. Herbs last 1-3 years depending on storage and type. A crushed or ground spice (like cinnamon or cumin) will last 2-3 years with their whole counterparts (like cinnamon sticks or whole cloves) will last 4 or more years. Poppyseeds and sesame seeds will last 2 years, but all other seeds will last 4 years. Extracts will last 4 years with the exception being real vanilla (not imitation), which will last forever. Really. In other things that last forever, salt will not go bad on you.
But, all of the above? Just guidelines. There is no set timeline of when spices will lose their potency. As I mentioned, the risk of spoiling is low.
To tell if a spice is still okay, first, observe it’s color. Is it still vibrant? If not, then it’s probably time to toss it. From there, you can crush a bit in your hand or rub the spice to warm it, then smell. How’s the aroma? If it’s weak, toss it and replace it.
If you’re in a pinch, and your spice isn’t up to it’s normal potency, then use a touch more than what you’d typically use– that will help bring out the flavor a little bit more.
But how do you keep spices from going bad quickly to begin with? There are a few ways you can keep your spices fresher for longer, cutting down on those replacement times.
First, you want to make sure your spices are stored in a cool, dark, dry place. That means you shouldn’t keep your spices near your dishwasher or your oven and cooktop.
“Okay,” some of you will be thinking. “Sounds like common sense.” But how many of us have gone and shaken our container directly over a pot of boiling… something? Your best bet is to measure your spice or pour it into your hand before putting it into your recipe, to prevent steam, moisture, heat, from getting trapped in the container.
When you set a spice aside, make sure it’s sealed tightly, and if you go to measure, never use a damp spoon. Make sure your spoon is completely dry so you don’t get the spice wet.
Finally, ensure all of your spices are in a sealed, airtight container. It should be completely closed to prevent anything getting in that shouldn’t.
Still wanting to go the extra mile to make those spices last? When possible, buy your spices whole and grind, crush, or grate them yourself just before using them. They’ll last the longest.
Mostly, just use your sense and remember that if it smells bad (or doesn’t smell at all), it’s probably not great anymore. If it smells fragrant, like it’s meant to, you’ll know to keep it. Spices can last a long time and pack a punch if stored correctly. Worst case scenario? Keep a paper taped inside the door of your spice cabinet with a list of your spices and their purchase date– then you’ll never have to ask “how long do spices last?” again!
Looking for more details about kitchen safety? Try this post on kitchen safety with kids.
10 Can’t-Miss Places to Clean Before Guests Arrive
Thanksgiving is right around the corner, and I’m going to guess that more than a few of you are hosting this year. I know how it is– you clean, and you clean, and you clean in places you think you’ve never cleaned before. But just when you think you’ve cleaned it all, sure enough, your Great Aunt Martha comes in and peeks in that one place you didn’t clean… yikes. Never fear– I’m listing out ten places you need to clean before guests arrive (but may have forgotten).
Front Closet
It’s November. Unless you live in Florida or Hawaii, you’re probably going to be taking a few coats. Beyond just cleaning it up a bit and making sure you have room for coats, now is a great time to purge any old, ill-fitting coats, make sure you have plenty of hangers for your guests, vacuum the floor inside in case any coats fall on the floor, and consider investing in a floormat for the closet if you live in an area where you may get some mucky, snowy, wintery boots.
Likewise, when you clean before guests arrive, you’ll want to consider cleaning a spare bedroom if you plan on keeping your coats in there instead of a hall closet. Wash the bedding both before and after you place coats on your bed (you never know what someone’s carrying on their clothing!) or consider just hanging the coats in a bedroom closet to keep them off of your bedding altogether.
Medicine Cabinet
Why the medicine cabinet, you might be asking? Because think about it… you know there’s going to be that one guest who snoops to see what you’ve got in there out of sheer curiosity. Go ahead and pack away any prescriptions, just for the day, and move anything you don’t want someone seeing out of sight. Better yet, stock your medicine cabinet with some extras just in case, like extra soap, mints, or feminine hygiene products, to help your snooping guests find what they may be looking for. Are you a family that likes having fun with each other? Stick a funny image that says you KNOW they’re snooping– like “Ha! Caught You!”
Refrigerator
Before your guests arrive, make sure you clean out your refrigerator. If you’re serving pot-luck style, there’s likely something that needs to be chilled until you sit down to the table, and how often does a guest end up helping themselves to something, even if you’ve set it all out where they need it? At the very minimum, cleaning it out allows you plenty of space for leftovers after the meal, so being proactive and getting it cleaned before guests come is a good way to have it done whether guests see it or not.
Couch Cusions
This is a MUST if you have pets or kids. For one, allergies are everywhere these days, so the last thing you want is a guest hacking and coughing because you missed some pet dander. You’ll remember to vacuum and sweep, but don’t overlook couch cushions. Further, make sure to check for any stray toys, and if you haven’t done it in awhile, pull the couch all the way out to sweep or vacuum underneath. You might be surprised!
Trash Can
On Thanksgiving, you’re bound to have a lot of trash getting tossed, from turkey carcasses to dinnerware (particularly if you go dish-free and serve on paper, because hey, we aren’t all Martha Stewart). The last thing you need is a smelly trashcan when guests go to toss something (even if it’s gum before the meal). Trust me, if you’re hosting, at least one person will use your trash– and that goes for the main trash and bathroom trash! Give your trash can a good rinse, air dry it, then either place a sachet under the liner, use a scented trashbag, or sprinkle in some baking soda to absorb the odor. Make sure your trash is empty (or close to it) when guests arrive and you shouldn’t have any issues!
Front Porch
It’s fall, and during the fall, you’re going to get some fall leaves. At a minimum, when you clean before guests arrive, you’ll want to sweep the porch free of debris. Not only does it make your house look prettier at a glance (because trust me, we all have that relative who will judge), it cuts down on what guests are tracking into your house, helping you beat some of that post-holiday cleanup before it starts.
Keurig or Coffeemaker
Is anything better than some coffee or cider after dinner? Well, coffee or cider from a clean Keurig, for one. When you use a Keurig, even if you follow the manufacturer’s instructions and brew an empty cup after each cup of coffee or cocoa. Check the coffeemaker section for special cleaners for your Keurig or Coffeemaker to keep them nice and cared for, or follow the manufacturer’s instructions (google your machine if you don’t know how to properly clean it) and get it spruced up so every cup on Thanksgiving tastes like the first cup.
Tupperware Cabinet
This is more for your own sanity and less for your guests seeing anything… but if you’re having leftovers, or think you might have some, check your tupperware cabinet in advance. Try pairing lids with containers and make sure you have matches in a variety of sizes. If yours are worn, broken, or missing, toss the old and get some new ones before the holiday– it’ll be a wise investment through Christmas and beyond. Planning on sending some leftovers home with your guests? Investing in some take-and-toss style tupperware is a nice touch. This way, if you get it back, great, but if you don’t, you didn’t send them home with your good stuff.
Microwave
This is particularly important if you happen to host a pot-luck style dinner, but even if you’re hosting a dinner where you plan to cook it all, something is bound to need reheating. Even if you keep a clean microwave, it never hurts to give it a good wipe down before your guests arrive.
Master bathroom (or another secondary bathroom)
I know, in a perfect world, you clean one bathroom and everyone uses that one and you can tuck clutter safely away in the other one, but it isn’t a perfect world. Someone is guaranteed to need to use the bathroom while someone else is, and you’re going to end up sending someone to a secondary bathroom. Save the embarrassment and clean up a second bathroom for guests to use. Oh, and don’t forget to clean out that medicine cabinet, too!
Did I miss any places you should definitely clean before you have guests arrive? Let me know in the comments below!
Best-Ever Road Trip Snacks
As Thanksgiving approaches, it’s clear that most of us are no stranger to the road trip this time of year. And to be honest, road trips can be long, a bit crazy, and a little bit intense. Sometimes the best cure for a sibling fight or the beginnings of a headache is some good, old fashioned, road trip snacks. If you’re looking to beat the cost of gas station fare (or perhaps have better food), here are a few ideas.
Crown Center Staycation Guide: Part 3
When it was time to think about getting away, I considered whether Zach and I should take a vacation or a staycation, then worked hard to plan our trip. When it was time to visit Crown Center we had a great time staying at the Sheraton Hotel and eating Minsky’s Pizza. We loved our visit to the SeaLife Aquarium, Legoland, and Fritz’s Railroad Restaurant. But when we checked out of the hotel, our Staycation wasn’t quite over– there was still more to do!
We decided to visit Union Station, literally less than a minute from the Sheraton in the car. Growing up, I remember when Science City opened, but Union Station, to me, meant some science activities and not much else… boy, has it changed! While Science City is still there, it’s grown and changed a lot, and there are other great experiences at Union Station that you can’t miss!
If you’re going to visit Union Station, I’ll tell you that the planetarium is a must-visit. And no, your kids aren’t too young or too old to see it, because there are amazing shows for any age. We went to the Sesame Street show (expected to continue through the end of November, 11/21/14), where Big Bird, Elmo, and a new friend from China show us how parts of the sky are the same, no matter where you live in the world. The show, meant for a younger age, encouraged interaction and participation, asking kids to draw shapes in the stars and answer questions verbally.
For older planetarium fans, there’s a Dinosaurs at Dusk show that is engaging for young minds who are past the Sesame Street age, running until 1/2/15. Black Holes is great for older fans, with discussions about what Black Holes are and the mystery behind them. That show runs until 1/4/15.
Finally, the Planetarium offers a show called “Stargaze Kansas City” which is perfect for learning more about the stars right above our own heads, some of which we’re missing due to sunlight or bright city lights. What’s amazing is that this show, which will run through 1/4/15 in it’s current state, changes throughout the year to show the stars that are currently visible as the night sky changes when seasons change.
Tickets to the planetarium’s shows run around $6, with some shows being free for Union Station members.
After the planetarium show, we decided to visit Science City, which is a Union Station classic. With ever-changing exhibits, many things are new, but others stay the same. When you first enter Science City, you see a corridor of activities that are simple and engaging. Honestly, this first corridor was our favorite part of the entire experience, and we could have spent most of our Science City time in there. Depending on your child’s age, they may find it equally entertaining or not. Regardless, there’s something for everyone inside of Science City.
One thing Zach really enjoyed was a table near the entrance of Science City where you could set objects (like balls and round pieces of PVC pipe) on a spinning tray and see how they’d move in reaction to the sudden force.
To me, the best part of Science City is seeing the awe on a child’s face as they test something out and it either does what they had expected it would, or doesn’t do what they anticipated at all– either way, they learn something, and can continue testing it out as long as they’d like. Zach played with this for a good 15 minutes, just placing the ball on top, and watching it fly in the air, then trying different balls of different styles and sizes to see what would fly the best.
It’s after the initial corridor that you get to the real “meat” of Science City, with 3 levels of various interactive exhibits. I will say that it seems at least a little bit of Science City is always under construction– I don’t think I’ve ever been that part of it wasn’t blocked off because they’re adding a new exhibit in place of an old one, so be prepared for restricted access to some sections of the museum. However, part of that construction is really nice– it means that there is something new to see again and again (while some sections of the museum, like melody park, are long-standing features).
Science City is, in parts, designed to be like a real city, complete with “hotel,” playground, the melody park, and more. Other exhibits stray from this theme completely, but most of them tie into the idea that you’re essentially in an indoor city that you can explore and play in, while learning great new things.
Zach particularly loved watching this robot, which would place marbles on a track that would roll through a maze. A very helpful employee at Union Station took the time to tell us about the class of the day, which was a robot building class, but Zach was just a bit too young for us to participate. With master classes most days, young science-minded individuals can try a hands-on activity within the museum.
One section of Science City that is particularly aimed at older kids is the amazing space exhibit, which shows how astronauts live and sleep. The idea of being able to see this in life-size is really exciting, and do some simple training tasks is very cool, but lost on a younger child. However, almost every exhibit has something that is exciting regardless of age, and for the space section, this rocket launcher was pretty cool. You pump a lever as much as you can as the clock counts down, and when it hits 0, the rocket will fly up a certain height depending on how much power you gave it by pumping. Pretty exciting!
Entire rooms were set up dedicated to different ages and stages, which meant there were some great dedicated activities for a younger age group, including soft-build block projects and musical activities.
Many of the sections were set up with the idea of free play and free discovery, but others had a watchful eye from Science City employees and were a bit more… strictly guided. In some ways, this dampened the natural exploration that children have, but in others, there were opportunities to learn a bit more past where a child may have discovered on their own. Because of this, there were some areas we just moved on entirely– at Zach’s age, free, open-ended discovery is a great way to learn. He did, however, enjoy looking at the bugs through the magnifying glasses and identifying different parts of their bodies through that up-close look.
One nice feature of Science City is that it’s great for railfans, especially on a rainy or cold day. We were able to sit at a checkers table inside of Science City and watch trains go by.
Most of the exhibits are very self-paced and interactive. One of the best exhibits in the entire place, in my opinion, was the exhibit where you learn about energy and power. There were various body-power exhibits that allowed you to run on a hamster wheel or ride a bike to light a bulb, and others where you could crank a handle to create wind to power wind generators and light up miniature homes. It’s always a good idea to open communication about renewable resources, and to do so in a way that helps a kid run off energy in a big hamster wheel is the best way, in my opinion!
Zach’s favorite exhibit was the PVC magnet wall, where you took PVC pipes with magnets and arranged them in different shapes, then dropped the ball into the pipe to see how fast it would roll. Different configurations produced different speeds, allowing the ball to get to the bottom straight away, or sometimes, not at all… we also enjoyed setting up different configurations and putting the ball in to see who would get to the bottom fastest.
If you want to check out Science City inside of Union Station KC’s website, you can find out more information about ticket pricing, parking, and hours to plan your visit, as well as find out about the most up-to-date attractions.
One final great perk that Union Station KC has, which is awesome for any train lover, is the model rail experience, where you can view tons of different model trains whirring around cities. Various scales, scenery, and time periods are a backdrops for the important part– the trains!
When I say they’re large, they’re definitely large. If your child loves to sit and watch trains like mine does, then it’s a great opportunity to watch them go through tunnels and over bridges and around houses.
As part of the rail experience, there is a bridge that you can take to walk directly over the tracks. It can get a little loud up there, but otherwise, it’s an amazing chance to stand above the trains and see them drive by. Again, the rail experience and this bridge are completely FREE parts of Union Station, so you can stop by and visit even if you choose not to visit the Planetarium or Science City. Combine the model rail experience and this train bridge with a trip to Fritz’s, and you’ve got the perfect “best day ever” for any future engineer.
Kansas City area readers, what’s your favorite place to visit? Let me know in the comments and I may make it a part of our next KC Staycation Review series!
Mississippi Mud Cheesy Potatoes
Note: This is a republication of a post that I shared in March. With the Thanksgiving season upon us, I thought a few of you might want to see it again. Happy Thanksgiving!
Bacon? Check. Cheese? Check. Tons of flavor? Absolutely. See, these are the easiest potatoes I think I’ve ever made, and they’re a hit with everyone. I mean, who doesn’t love cheesy potatoes with bacon?
One of the many recipes that came from the family recipe box, this handwritten recipe with an unknown source simply stated “They’re named for the famous river because they’re LONG on taste and MIGHTY good!” Well, they didn’t disappoint, anyway! Cheesy potatoes get a big punch with this recipe because of the added bacon, the creaminess, and the green onions.
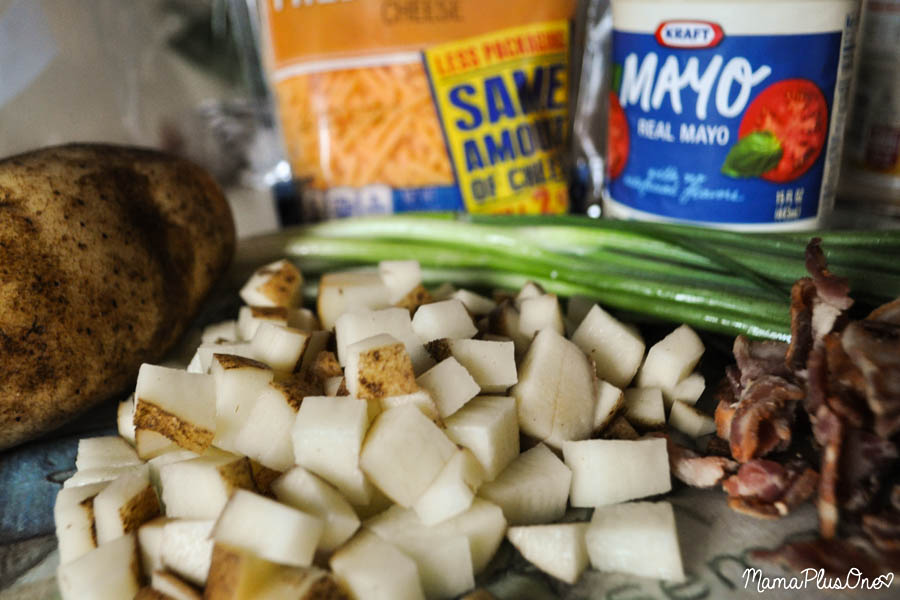
Start with some ingredients you may already have– 8 to 10 cups of potatoes, diced, 1 cup of Mayonnaise (the real deal, not salad dressing), about a teaspoon each of salt and pepper, a 16 ounce block of cheddar, diced (or the equivalent in shredded cheddar), 1/2 a cup of green onions, chopped, and a package of bacon. You can add half a cup of olives if you’d like to, but why ruin perfectly good potatoes? (Unless you’re an olive fan, in which case, you probably don’t see that as ruining them).

Start by slicing your bacon into pieces. Don’t look at me with that shocked face that I get every time someone sees me do this… you can TOTALLY bacon your bits instead of bitting your bacon. This method gets a lot less grease on your hands because there’s no tearing it up post-fry… if you do the cutting first, your bacon will be in perfect bite sized bits when you’re done. I promise. Just trust me– cutting bacon is NOT bacon blasphemy, no matter what anyone tells you.

Put that in a pan and cook it, trying not to eat too much bacon as the smell fills the air. Seriously, bacon is so hard to resist. That’s why there is bacon everything. While the bacon cooks, start peeling and dicing your potatoes, dicing your cheese, and chopping your green onions.

Delicious! Finish getting your other ingredients chopped and ready.
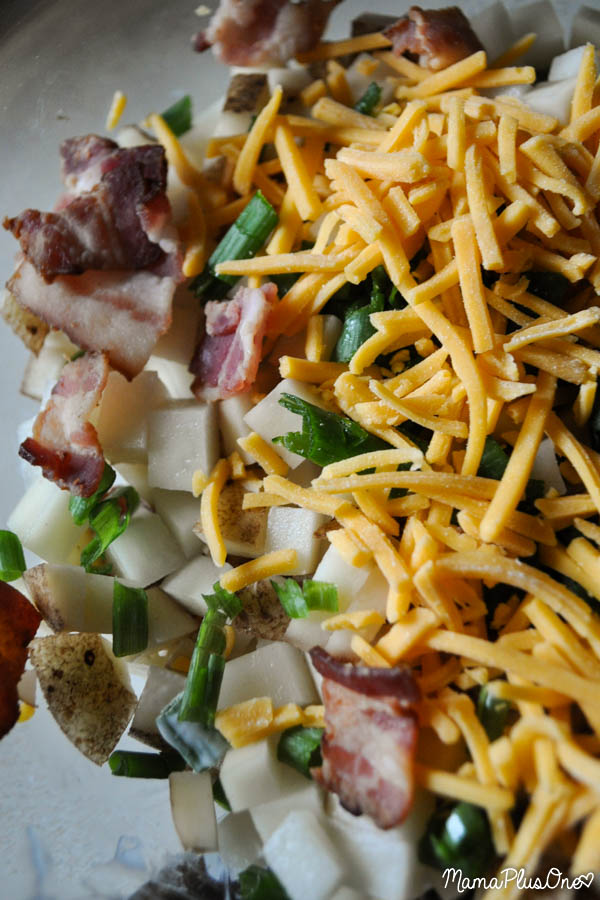
In a 9×13 pan or a 3 quart casserole dish, mix the green onions, cheese, bacon, and potatoes. If you’re adding olives, now is the time to do that, too.
Toss the ingredients with mayonnaise, coating well. Bake for an hour and a half, or until the potatoes are tender, in a 325 degree oven.
Enjoy that bubbly, bacon-y, cheesy potato side dish. You could even add in some hamburger meat or chicken and make it a main dish, if you wanted to.


- 8-10 Cups potatoes, diced finely
- 16 ounces cheddar cheese, cubed or shredded
- 1 Cup mayonnaise (real)
- 1 package bacon, cooked and torn into large bits
- 1/2 Cup green onions, chopped
- In a 9x13 pan or 3 quart casserole dish, mix potatoes, cheddar cheese, bacon, and green onions.
- Stir in mayonnaise.
- Bake at 325 for an hour and a half or until potatoes are tender. Top with additional cheese if desired.
If you love the combo of cheese and potatoes, you will want to check out the cheesy potatoes in this Hearty Cheeseburger Soup!
Did you originally see this post on Pinterest with this image? Trust us, it’s still the same recipe! DigitalEraMom.com is now MamaPlusOne.com, and has a whole new look. As we update our whole new look, we’re working hard to update our photos, also. Don’t forget to take time to poke around our site and see what else is new– we think you’ll like what you see!
The following links are affiliate links from Amazon. By clicking, I would be making a little revenue from your purchase at no additional cost to you. Thank you for your support.
Chicken Potato Pot Pie (Or How To Use Leftover Turkey!)
It’s been a few years since I made my very first homemade chicken pot pie. I had been tackling pie crust using my great-grandmother’s no-fail pie crust recipe, and wanted to branch out from apple and peach. My first few attempts came out pretty similarly to store-bought, but then I noticed a crazy trend. I’d make the chicken pot pie, everyone would rave about it, and then there’d be a smattering of peas, green beans, and lima beans on everyone’s plate at the end… I needed an alternate plan to make sure half of our filling wasn’t going uneaten, which meant asking my family about the produce they preferred… and that’s how my chicken potato pot pie was born!
Kansas City Crown Center Staycation Guide: Day 2
If you tuned in last Wednesday, you saw a glimpse at the first day of our Crown Center staycation, where I reviewed the Sheraton Crown Center and shared why we love Minsky’s so much. I also talked about why the pool deck of the Sheraton has, hands-down, the best sunset view in Kansas City.
But the first day was hardly the only exciting thing about our awesome staycation. Day two had a lot of really exciting things in store, including Sea Life Aquarium, Legoland Discovery Center, and Fritz’s Railroad Restaurant!
Kansas City Crown Center Staycation Guide: Day 1
Though I haven’t lived too far south of the metro for most of my life, and while I have been to Crown Center and seen a few of the sites and activities at one time or another, there was still plenty I was missing out on. For the longest time, I was spending my vacation time, energy, and money outside of my own city, trying to see other places. Then I got it through my thick skull that I needed a vacation, pronto. When a local homeschooling week offer came across my inbox, I knew I needed to take the leap and plan a Crown Center vacation for my little one, whether or not we went during that week. There was just way too much family-friendly stuff for us to miss out on Crown Center!
Our staycation started on a Monday afternoon when we first arrived at Crown Center. We were staying at the Sheraton Crown Center in Kansas City. The Sheraton hotel is one of two hotels that connects directly to Crown Center, which is really convenient– you park once and that’s all you have to do the entire time, since you can essentially walk wherever you’d like to go.
I will note that, regardless of what anyone might tell you when you book your hotel, the parking is $16 per night. I’d initially been informed that it was $16 for the duration of the stay, so I wasn’t a happy camper. However, the Sheraton worked really hard to make it right, which was awesome of them. You’ll also want to note that when driving to the Sheraton, the parking garage has the address of the Sheraton on it, not the Sheraton hotel name– I drove past it three times looking for a parking garage that said “Sheraton.” Oops. Keep an eye out for the garage and you can’t miss it, but if you’re expecting a clearly marked Sheraton garage, you’ll run into problems like I did.
At the front desk, I talked to the really awesome desk attendant, who actually happens to be from the small town right next to mine. Because Sheraton internet is $10 each night, I asked if there was anything he could do for me there, and he was able to waive that fee– the point there is that it never hurts to ask for an upgrade or a special something thrown in when you’re checking into a hotel. When I had booked my room, they actually had me on a lower floor, but when I got there, he was quick to tell me that another room on a higher floor was available, and we were moved up to the 28th floor! Zach loved looking at the amazing view from our window, and watching all of the buses drive by. I’m so glad we were able to stay on the 28th floor, because one of the best parts of our stay was the incredible view.
Even though an SPG rewards account can’t guarantee you upgrades, getting one is a great idea, because it’s free, and if you stay at any of the Starwood Preferred Group hotels (including Sheraton, Westin, and many others), you’ll earn points for your stays that can be redeemed for free nights or even airline miles– it’s worth joining the club!
Finally, the desk attendant also asked us if we’d like to forgo housekeeping. If you’re making a short stay, it’s a wise choice– you’ll get a voucher for $5 off at the hotel restaurants if you do! To me, if I’m staying just a couple of nights, I’m fine using the same towels and sheets. How many of us really change our towels and sheets every night at home? Housekeeping on a two night stay just isn’t necessary for me, and saving $5 is awesome!
For dinner, we decided to order Minsky’s Pizza. Our thought process was essentially that we wanted affordable pizza that would deliver to our hotel, and Minsky’s did just that. Plus, I’d read some good reviews online, and Minsky’s has the distinction of being rated Kansas City’s Best Pizza since 1976– no small feat! While there were definitely other pizza places that delivered to our hotel with a wider variety of options (like a pizza/deli that had cake!), Minsky’s was by far the most affordable choice, and it’s high rating for gourmet pizza made it a must-try. For around $30 including tax, tip, and delivery, we got a large cheese pizza, a good sized order of breadsticks, and some breaded mushrooms. Not bad!
One thing to note that threw me a bit was that even if they ask for your room number on the phone, Sheraton does not allow the pizza delivery to go up to your room (it’s a safety concern). You’ll need to meet them in the lobby, so be ready– they call when they’re approaching and you head down to pick it up. I was totally unaware of this (because I’d stayed in other hotels where pizza deliveries go right to your room), so I wanted to share this detail.
Because the Sheraton has a mini fridge in-room, we were able to save leftovers for a midnight snack. We are a big fan of bringing our own snacks and breakfast foods along to cut down on the expenses that room service incurs (the Sheraton doesn’t have a complementary breakfast, but there is complementary bottled water and coffee in your room!), so we paired our pizza with grapes we had brought along.
After dinner, we decided to head over for a swim. The Sheraton has an outdoor pool, but it’s heated, meaning even when it’s chilly, you are able to go for a swim. To get to the pool, you need to go down to the Mezzanine level from your room, then go across a walkway and over to a small, gold elevator. That will then take you up to the health club, where you can take the stairs or another elevator up to the key-access pool. If you get lost, the front desk is always happy to give directions as to which elevators to take and where they’re at.
One unique feature of the pool is the little tunnel– there’s an area where you can enter the pool indoors (no larger than a hot tub) and then swim out through a tunnel. In the cooler months, it helps you get adjusted to the water before hitting the cool air, and allows you to exit and enter in a heated room instead of the cold breeze. Plus, what kids don’t love swimming through a short tunnel? My big recommendation with the pool is to visit around sunset. Whether or not you choose to swim, the pool deck is the best place to watch the sunset– it’ll set just past Union Station, giving you an amazing view. We loved watching sunset over Union Station from the pool– it’s the perfect viewing place! Because the pool is open from 5am until 10pm, there are plenty of hours in the day for a dip in the pool.
I will note that, when we returned from the pool, we had thought we’d watch a little TV before bed. There’s very little children’s programming on the hotel TV, so if that’s part of your routine, I’d suggest just bringing some books to read or a device like we did, so we could Netflix on our Kindle. There is PBS, but that programming ends around 5 or 6pm, and then there’s Nick, but that programming ends fairly early before switching to Nick at Night, also, so definitely plan to bring a backup plan for kiddos.
Overall, we had a wonderful experience at the Sheraton hotel, and definitely plan to stay there again the next time we’re in Kansas City. I’m also a huge fan of Minsky’s pizza now, and can’t wait until I’m able to grab those breaded mushrooms again– yum!
Stay tuned to hear more about our staycation adventure, with reviews of other great Crown Center hot spots like Legoland, Sea Life Aquarium, and Fritz’s Railroad Restaurant!
Quick and Easy Beans and Rice
I love easy meals. Anyone who has been reading for long knows a quick and easy meal is definitely the way to my heart! When I was fixing dinner the other night, I took a look and… oh no. No sides. I had nothing to pair with the chicken I had already started boiling! So, I took to the pantry to see just what I had inside… and out of my pantry findings, this very flavorful, very easy beans and rice came to be!
You’re going to start with 4 cups of minute rice, a bag of frozen corn, a can of kidney beans (drained), a can of diced tomatoes (also drained), a finely diced bell pepper, a can of chicken broth, and a package of ranch dressing mix. But here’s the best part: if you don’t have one or more of those ingredients, sub them out! These beans and rice are totally flexible!

